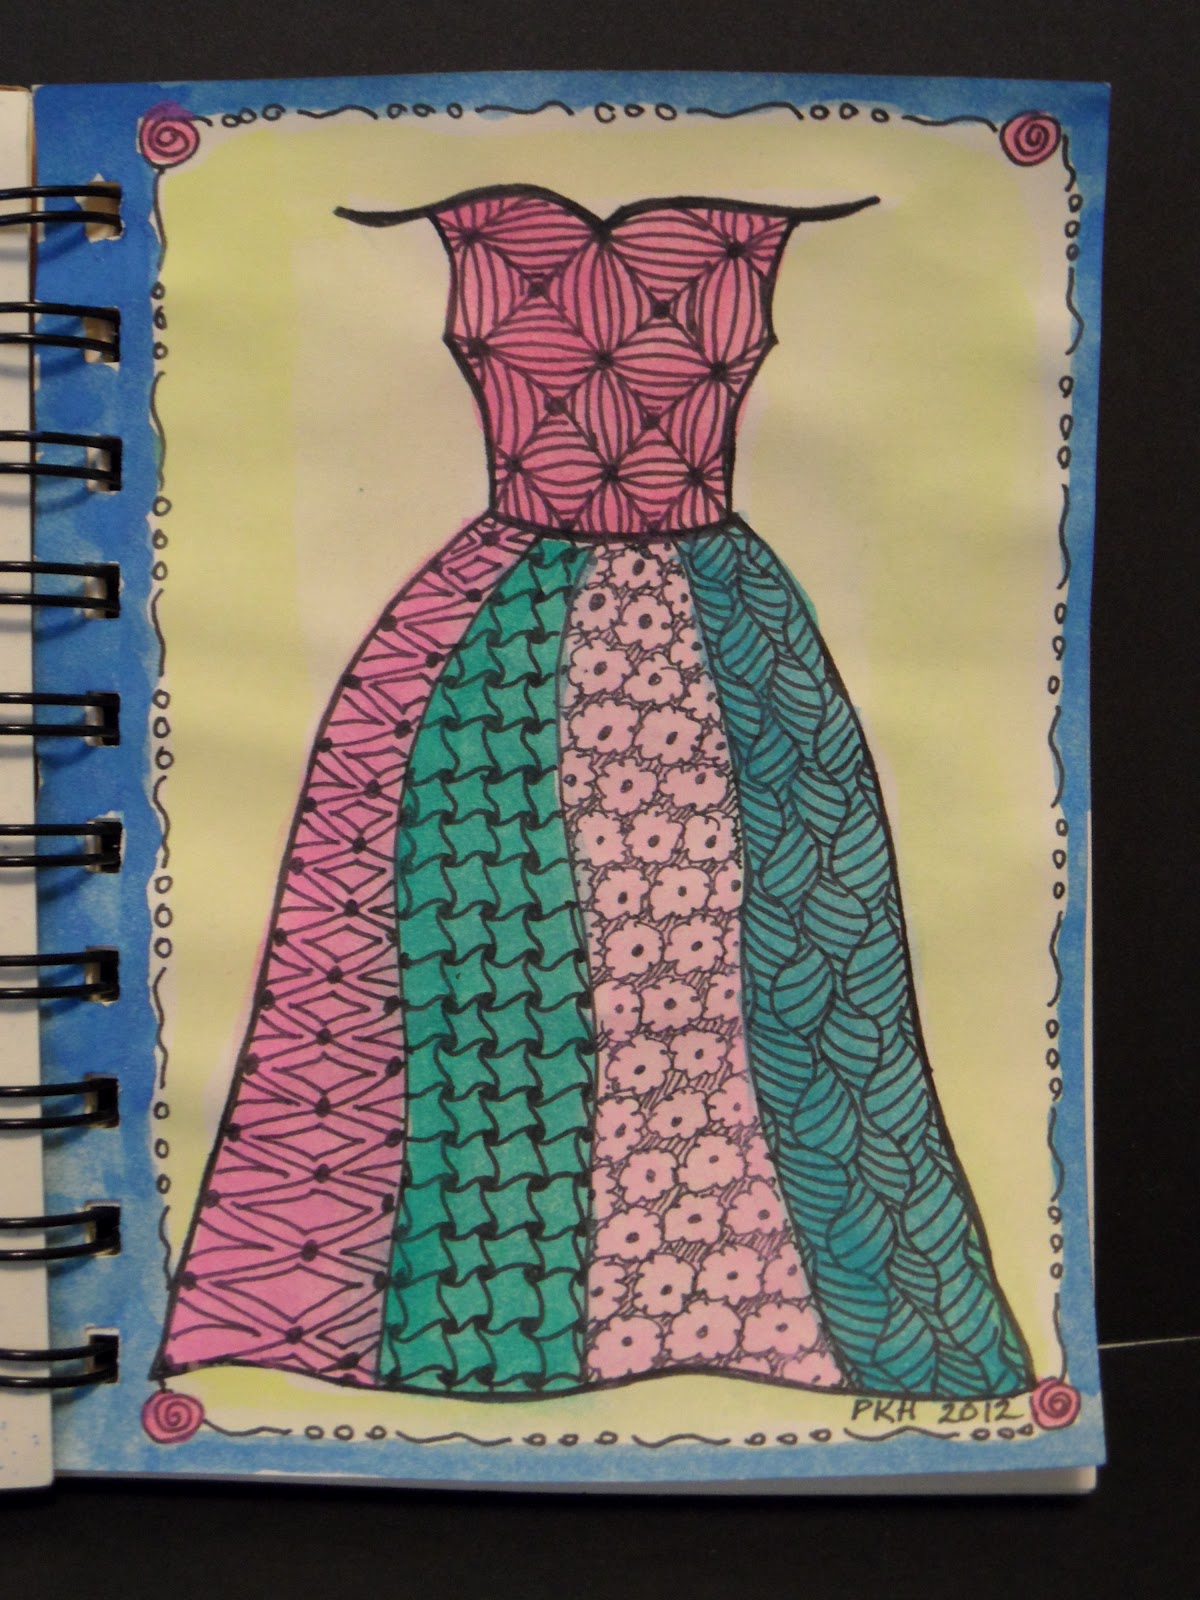
This page in my small sketch journal was inspired by a new tangle pattern I saw on www.TanglePatterns.com called Cayke created by Rose Brown. I wanted to give the pattern a try and this is what I created. The Cayke tangle is at the top and bottom of this tangle.
This was fun. Have you tried a new tangle pattern lately? Give it a try.
Happy Tangling! :D
Wednesday, October 3, 2012
Tuesday, September 18, 2012
Stampscapes - Retirement Bliss
This is the card I made for a retirement-birthday party. The couple will be going to Florida for the winters now so I made the card with a tropical theme. The two chairs represent rest and relaxation.
I used stampscapes stamps for the scene and the chairs are a stamp by Rosewood Canada www.FrogsWhiskersink.com. They are called Muskoka Chairs F727.
I used matte cardstock and inks and coloured pencil to add the colour to the scene.
Retirement is a wonderful thing! Make the best of it! Do what you love with passion! :D
Monday, September 17, 2012
Zentangles Inspired Art Sketch - Old Stapled Paper
I did this sketch in my small drawing journal. I wanted to make it look like an old torn piece of paper. I thought I would leave it blank so that I could copy it and use it on other journal pages and fill in whatever words I need.
I started this in a doctor's office waiting room. The people there were quite fascinated to watch what I was doing. Some even came over to watch and ask me about it.
Happy sketching! :D
I started this in a doctor's office waiting room. The people there were quite fascinated to watch what I was doing. Some even came over to watch and ask me about it.
Happy sketching! :D
Friday, September 7, 2012
Tree Art Journal - Spooky Halloween
I had added some leftover paint to this page in my tree art journal quite a while ago and didn't know what to do with it. It had some weird shapes in it and it looked kind of creepy so I decided to do a Halloween scene on it. I drew and painted the tree and painted in some plants and grasses in the foreground. Then I got out my Halloween stamps and started to add the spooky details with inks. I then stamped a ghost on a used dryer sheet and cut it out and glued it up in the tree.
Autumn is just around the corner so I guess I'm getting into the mood.
Happy creating! :D
Autumn is just around the corner so I guess I'm getting into the mood.
Happy creating! :D
Tuesday, August 28, 2012
Art Journal - Bright Pink Flowers
I sketched some flowers in pencil and then wanted to see if my Tombow markers would blend with a paint brush by putting some marker on the paper and then blending it out with wet brush. They would not. I will have to try it on some other kind of paper.
So I coloured the Tombow markers onto an acrylic block and then picked up the colour with a wet paint brush and painted the flowers and leaves and background.
Then I sketched over the painting with a Sharpie marker.
I love to experiment in my journals to see what the different types of media will do.
Have a great day! :D
Monday, August 20, 2012
Wedding Card for Chris and Lacey
This is the wedding card that I made for my son Chris and my new daughter-in-law Lacey. I used a photo from their wedding inside an embossed frame that I made using the Cuttlebug folder called Grace's Frame. I popped the photo and frame up on pop dots. I used punches and die cuts to make the flowers and leaves and branches and swirls for the embellishments. For the card base I used a Martha Stewart border punch that looks like eyelet lace. I made everything in white cardstock and used pearls for the centers of the flowers.
Here are two more views of the card.
It was a beautiful wedding with a beautiful couple. I wish them a lifetime of happiness together! Be good to one another!
xxxooo
Here are two more views of the card.
It was a beautiful wedding with a beautiful couple. I wish them a lifetime of happiness together! Be good to one another!
xxxooo
Friday, August 17, 2012
Altered History Book Art Journal - Vintage Fashionable Girl
This is a two page spread that I did in my altered Grade 11 History textbook. The page started out with some leftover paint on it. It sat that way for months. Then I found some paper in my stash from Bisous Cutouts by Suzanna Carillo that I thought would look good with this background. The pictures are all vintage.
Then I started to play with the background! I did some sponging of paints to add more colour, some sponging paints through stencils, and some stamping with ink. I cut out the images and adhered them to my pages. After that I did some doodling and colouring with pens around the frame of the page and around each picture.
The right hand side of the page has the main title that reads "What Every Fashionable Girl Needs". The two items she needs on this page are "A Smart Pair of Shoes" and "A Tasteful Handbag".
The left hand side of the page has more items that the fashionable girl needs. She needs "A Fetching Smile", "A Great Hat", "A Charming Personality", and "A Pretty Frock". These sound kind of funny, but I guess times really haven't changed all that much.
The colours in the pictures are very subdued to make them look vintage.
I hope you enjoyed your trip down memory lane with me. :D
Wednesday, August 15, 2012
Zentangle Inspired Art - Umbrella on black cardstock
I had my sister Lou over and we did some zentangling. We drew an umbrella on black cardstock and tangled with gel pens. I chose the glittery gel pens and filled in all the sections of the umbrella with different tangle patterns. It was fun to sit and tangle with her doing it too. I always enjoy creating with others to share the fun.
Have a great day! :D
Thursday, August 9, 2012
Altered History Book Art Journal - Look for the Rainbow
I painted this page a while ago in my altered history book. For this mixed media page I used acrylic paints, stamps and ink, pencil, collage and markers. I had glued 3 pages together first and then gessoed the page before painting.
The words say "After every storm, look for the RAINBOW".
I wish you all many rainbows!
Take care! :D
The words say "After every storm, look for the RAINBOW".
I wish you all many rainbows!
Take care! :D
Wednesday, August 1, 2012
Zentangle Inspired Art - Dress
I drew this dress in my Manila Sketch Journal. I divided it into sections with my micron pen and then drew different zentangle patterns in each section. I drew a border around the page and then painted the whole sketch with watercolour paints.
Can you believe it is August already? Where is this year going?
Make the most of each day by being creative and having fun! :D
Can you believe it is August already? Where is this year going?
Make the most of each day by being creative and having fun! :D
Wednesday, July 25, 2012
Sympathy Card - Wildflowers and Butterfly
I made this sympathy card using the masking technique. I cut an oval from a piece of paper and used the hole left by it over the card front as a mask. I then stamped my scene and sponged some ink inside the mask. I removed the mask and stamped the sentiment and added the butterfly. I used a border punch for the bottom and added some ribbon. I like to keep the colours fairly muted for a sympathy card.
Although sympathy cards are for sad occasions, they can still bring some comfort to those grieving. *HUGS* to those that need them.
Sunday, July 15, 2012
Stampscapes - Dock of the Bay
I did this 8.5" x 11" Stampscapes scene when I was visiting my friend Pat in Green Bay, Wisconsin. I used a stipple brush to apply most of the ink and some markers for details. I used a torn paper for a mask to make the clouds in the sky.
Larger scenes like this are fun but take a bit more organizing than a smaller card sized scene. Give one a try!
Take care and keep creating! :D
Larger scenes like this are fun but take a bit more organizing than a smaller card sized scene. Give one a try!
Take care and keep creating! :D
Tuesday, July 10, 2012
Stampscapes - Tropical Sunset
I stamped this card at the Savanna Stamping Retreat in 2011. I added most of the colour when I was there with dye inks and stipple brushes. I finished it at home with more colour to frame it and then stamped the palm leaves and grasses.
I just love that sun stamp that I used at the retreat and now I'm going to have to order it. :D
Have a great day and I wish you all beautiful sunsets.
I just love that sun stamp that I used at the retreat and now I'm going to have to order it. :D
Have a great day and I wish you all beautiful sunsets.
Saturday, July 7, 2012
3-D Hand Art
Isn't that cool? *L* It looks like I painted over my hand!
I saw this on Pinterest and just had to give it a try. I used a black Sharpie marker and some Stampin Up and Tombow markers to colour it.
I just love trying new techniques. Have you tried something new lately? It's exciting! :D
I saw this on Pinterest and just had to give it a try. I used a black Sharpie marker and some Stampin Up and Tombow markers to colour it.
I just love trying new techniques. Have you tried something new lately? It's exciting! :D
Friday, July 6, 2012
My Mom's 90th Birthday Card
This is the card I made for my Mom's 90th birthday. It has 90 candles glued on. I found this idea on Splitcoaststampers. There are several versions there and this is my take on it. Love it!
This is the front of the card. The three owls represent Mom's three girls.
This is the end of the card.
The card fold up and lies flat but I didn't make an envelope for it! *L*
I had a lot of fun making this but I confess that it did take a long time. It was worth it though.
Happy Birthday Mom!!!!
xxxooo
Subscribe to:
Posts (Atom)